8.7 KiB
Title: Networked Backups over VPN Date: 2018-7-25 Category: storage Tags: NAS, diy, vpn Slug: network-backups-over-vpn Description: How to set up a spare olimex board as a networked backup disk Status:draft
#Introduction
The idea behind this setup is to make a so-called NAS (networked attached storage) which can be used as a remote back-up drive for your data. The setup is really meant as a low power, 'set and forget' solution. It connects to a public server via a VPN so it isn't publically accessible and doesn't need any open ports in a home router.
This particular set up will be connected via the homerouter of the author's parents.
Hardware involved
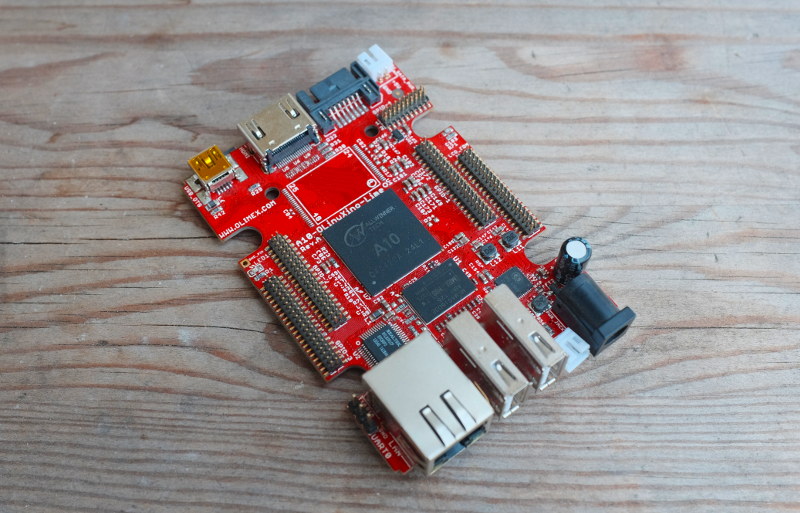
- Olimex Lime A10 512mb ram, 1 core Fairly limited resources but like all olimex boards it has support for SATA disks and Li-Po batteries
The distro used is Armbian, unfortunately it is not supported beyond Debian Jessie anymore.
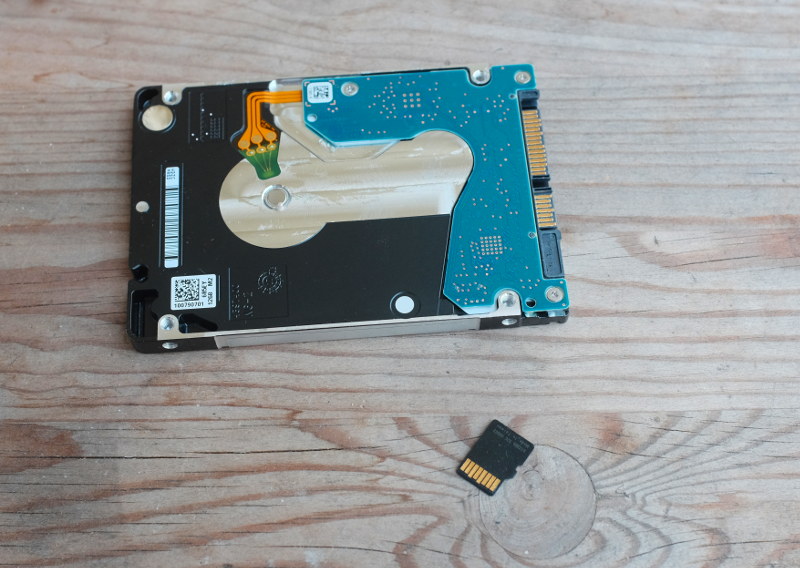
- Class 10 Micro SD card that has a capacity of at least 4GB
- 2TB Hard Disk, 2.5" inch model that fits in laptops
- A SATA Cable and a SATA-PWR cable, the SATAP-PWR cable needs a JST connector on one end. This can be easily DIY'd or purchased via the Olimex website
- Powersupply that is able to feed both (5v, 1.2Ah).
- Access to a router and a ethernet cable
Setting up the Olimex
Installing Armbian on the Olimex
In case you run into trouble during this part of the install, make sure you have read Armbian's Troubleshooting
Grab the 'Armbian Jessie' image from Armbian. It is the image described as suitable for servers.
Once you've downloaded and unpacked the .7z insert your SD card into your computer and proceed to write the image to the SD card:
sudo dd if=/path/to/Armbian_5.31_Lime-a10_Debian_jessie_next_4.11.6.img of=/dev/mmcblk0 status=progress
After having copied the image to the SD card insert it in the board and connect it via the ethernet cable to the router and then connect the power supply, in that order.
After about a minute your board should have booted up. Now the trick is to find it on the network.
In case you have access to the router's admin panel you should be able to find it quickly there.
Otherwise, using another computer connected on the same local network, try to find it running nmap:
sudo nmap -p 22 --open 192.168.1.0/24
This command will scan the entire local network and list devices with port 22 open. The olimex board should be listed there. Make sure you use the IP adress range that is applicable in your situation and don't just copy the above command.
After having found the IP adress of the board login for the first time:
ssh root@192.168.0.105 use password 1234
Upon a successful login you should be greeted with the welcome screen and a prompt to change the password and make a user.
Updating Armbian and configuring the Olimex
Then we upgrade the system from Stretch to Jessie (assuming you still run as root):
First 'unfreeze' the kernel version by running armbian-config entering the 'hold' menu, unsetting the freeze and then exiting back to shell.
Replace the version in the sources file and updated the sources:
sed -i 's/jessie/stretch/g' /etc/apt/sources.list
apt update && sudo upgrade
Once you've done that reboot and hopefully the machine should boot into the new kernel and operating system.
Log back in with the user you created before.
After you manage to log back in change the hostname to something else:
sudo sed -i 's/lime/depot/g' /etc/hostname /etc/hosts
Disable logging in as root over ssh to enhance security:
edit /etc/ssh/sshd_config and change PermitRootLogin yes into PermitRootLogin no
Afterwards restart ssh sudo /etc/init.d/ssh restart
Setting up the VPN
To set up the virtual private network we'll use a very light and easy to configure vpn software called tinc. See https://tinc-vpn.org
First make sure you install it sudo apt update && sudo apt install tinc.
We will be making a network consisting of homeserver and nas, wherby server as a publically reachable IP address.
Configure for homeserver
First start out on homeserver and make the directory for the vpn called backupnet
sudo mkdir -p /etc/tinc/backupnet/hosts
Make a configuration file with sudo vim /etc/tinc/backupnet/tinc.conf and edit it so it looks like this:
Name = homeserver
AdressFamily = ipv4
Interface = tun0
Port = 655
Then create a host config file for homeserver with sudo vim /etc/tinc/backupnet/hosts/homeserver. Edit it so it looks like this:
Address = homeserver_public_ipaddress
Subnet = 10.0.0.1/32
Port = 655
homeserver_public_ipaddress refers to your servers public ip4 adress. The subnet is the IP adress and range your VPN will use.
After you've done that generate a set of keys for this host (the default paths are fine):
sudo tincd -n backupnet -K 4096
Now that you have set up the host file we make a set of two scripts to start and stop the VPN.
First a script to start the vpn sudo vim /etc/tinc/backupnet/tinc-up and add the follwing:
#!/bin/sh
ifconfig $INTERFACE 10.0.0.1 netmask 255.255.255.0
Then a script to stop the vpn sudo vim /etc/tinc/backupnet/tinc-down and add the following:
#!/bin/sh
ifconfig $INTERFACE down
Make both these scripts executable with: sudo chmod 755 /etc/tinc/backupnet/tinc-*
Configure for nas
Now we will configure the vpn for the nas:
Again we make a directory for the vpn:
sudo mkdir -p /etc/tinc/backupnet/hosts
And again make configuration file with sudo vim /etc/tinc/backupnet/tinc.conf and edit it so it looks like this:
Name = nas
AdressFamily = ipv4
Interface = tun0
Port = 655
We also create a configuration file sudo vim /etc/tinc/backupnet/hosts/nas and edit so it looks like this:
Subnet = 10.0.0.2/32
Port = 655
Generate a set of keys for this host:
sudo tincd -n backupnet -K 4096
Make the start and stop scripts again:
sudo vim /etc/tinc/backupnet/tinc-up containing:
#!/bin/sh
ifconfig $INTERFACE 10.0.0.2 netmask 255.255.255.0
sudo vim /etc/tinc/backupnet/tinc-down containing:
#!/bin/sh
ifconfig $INTERFACE down
Make both these scripts executable with: sudo chmod 755 /etc/tinc/backupnet/tinc-*
Share the keys & test the network
You'll now have:
- a file called
homeserverin/etc/tinc/backupnet/hosts/on homeserver - a file called
nasin/etc/tinc/backupnet/hosts/on nas
Make you copy homeserver to /etc/tinc/backupnet/hosts/ in nas and nas to /etc/tinc/backupnet/hosts/ homeserver via scp or by copying the contents of each file from one terminal to the other.
After you've done that you should be able to test the network by running sudo tincd -n backupnet -D -d3 first on homeserver and then on nas.
If all is well the terminal output should indicate that both nodes see each other.
You should also be able to run ping 10.0.0.1 on nas and get confirmation.
Once you've confirmed this works you can quit the process with ctrl + \ (ctrl+c is not sufficient)
Start VPN on boot
To start the VPN on boot add the tinc service for this network to systemd like so on both nas and homeserver:
systemctl enable tinc@backupnet
systemctl start tinc@backupnet
You should be able to confirm tinc is running by checking the output of ps aus | grep tincd
Configuring the HDD
We will do some tweaking of the HDD configuration.
First we change the spindown time of the HDD to 2,5 mins to conserve energy:
sudo hdparm -S 30 /dev/sda
Then we make sure the disk automatically mounts on boot:
auto mount the disk on boot
Ideally the backup disk is mounted on boot, to do so we need to add it to the fstab entries
First make the directory where the disk will be mounted:
sudo mkdir /media/depot
Make sure you user owns that directory:
sudo chown [user]:[group] /media/depot
Make it readable and writeable by the user:
sudo chmod +rw /media/depot
Then get the UUID of the HDD with sudo blkid which should return something like:
/dev/sda1: UUID="bfb5d60e-66a3-4ff6-87af-e1b8dd445c23" TYPE="ext4" PARTUUID="f5e7af1b-01"
Copy the UUID and then edit /etc/fstab
Add the following line:
UUID=47bc15ca-aa8c-49e5-b0df-815775f79bb5 /media/depot auto rw,user,auto 0 0
Where UUID reflects what you got from blkid
To test whether it works you should be able to run mount /media/depot/ without sudo and it should mount. Confirm with df -h


